MAY/JUNE 2018 LEVEL 3 DESKTOP PUBLISHING
Welcome to this comprehensive exam preparation resource for Desktop Publishing (Level 3). This interactive guide contains the complete set of questions from the May/June 2018 examination, along with detailed answers to help you master the concepts.
Designed specifically for Armstrong Computers College students, this resource allows you to:
- Test your knowledge by clicking on questions to reveal answers
- Understand key desktop publishing concepts through clear explanations
- Prepare efficiently with organized, exam-style questions
- Practice real-world skills with the included practical section
Pro Tip: For offline study, download the PDF version of the questions. Remember that answers are only available in this interactive format to encourage active learning.
File extension: .pub
Steps: File → Save As → Choose location → Select 'PDF' under 'Save as type' → Click Save.
Insert → Table → Choose number of rows and columns → Click OK → Adjust table frame as needed.
Header/Footer: Sections at the top and bottom of a page used to display repeating information.
Steps: Insert → Header & Footer → Type desired text → Click Close.
Edit Master Pages: Modify elements that appear on multiple pages.
Apply to Pages: Assign master page layout to specific pages.
Bring to Front: Places an object above all others.
Send to Back: Moves an object behind others.
Align: Aligns objects relative to each other or the page.
Group: Combines objects to act as one.
A template is a pre-designed layout used to quickly create documents.
Examples: Business Card Template, Flyer Template
Frames are containers used to hold text, images, or objects.
Text Frame: Holds text
Picture Frame: Holds images
Handles are small squares on the corners and sides of selected objects used for resizing or rotating.
Search Box: A tool to find content or features.
Search Limiter: Filters results to narrow down searches.
Adding: Insert → Choose Text Frame or Picture Frame → Click and drag to draw.
Deleting: Click on the frame → Press Delete key.
SECTION B – PRACTICAL
This practical section is meant to help students practice designing a professional business card. Carefully follow the steps provided below to complete the task. A sample business card is displayed to guide your design.
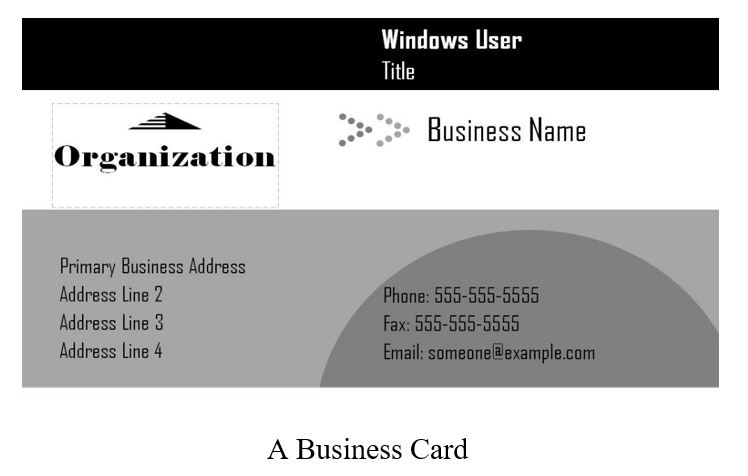
- As a graphic designer, a customer has brought you a sample of a business card to design. View the image above as the sample.
- Design a business card using your own imagination based on the sample layout.
- Include THREE address lines, phone number, fax number, and an email.
- Save your design with your name and index number.
- Print your final design.